How To Configure a Point of Sale (POS) Item
This Help Topic will guide you through the steps involved in adding and configuring a Point of Sale (POS) Item in your Skyware Systems set up. It is the Point of Sale (POS) Items command on the Point of Sale (POS) Configuration menu that allows you to add or edit Point of Sale (POS) items from the system. See Point of Sale (POS) Configuration Menu Overview.
This Help Topic will assume that your system has the appropriate Outlet(s), Meal periods or Time Periods, Display categories or Pick categories, Preparations, Modifiers, and Kitchen stations already configured within the system. If not, see the Help Topic How To Configure Your POS Options.
Each Point of Sale (POS) item has three sets of properties to configure and three different tabs for doing this: General, POS and Inventory. You will need to work through each tab in turn to properly configure a Point of Sale (POS) Item.
1. For adding or configuring a Point of Sale (POS) Item, you will need the Point of Sale (POS) Configuration menu.
 (To reach this menu:)
Log In.
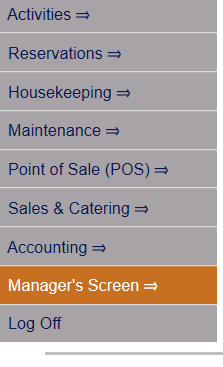
From the quick menu (left) choose Manager's Screen to be taken to the MANAGER'S COMMANDS screen.
Select Configuration to be taken to the PROPERTY AND SYSTEM CONFIGURATION screen.
Select Point of Sale (POS) Configuration from the Sub-Systems area of the screen.
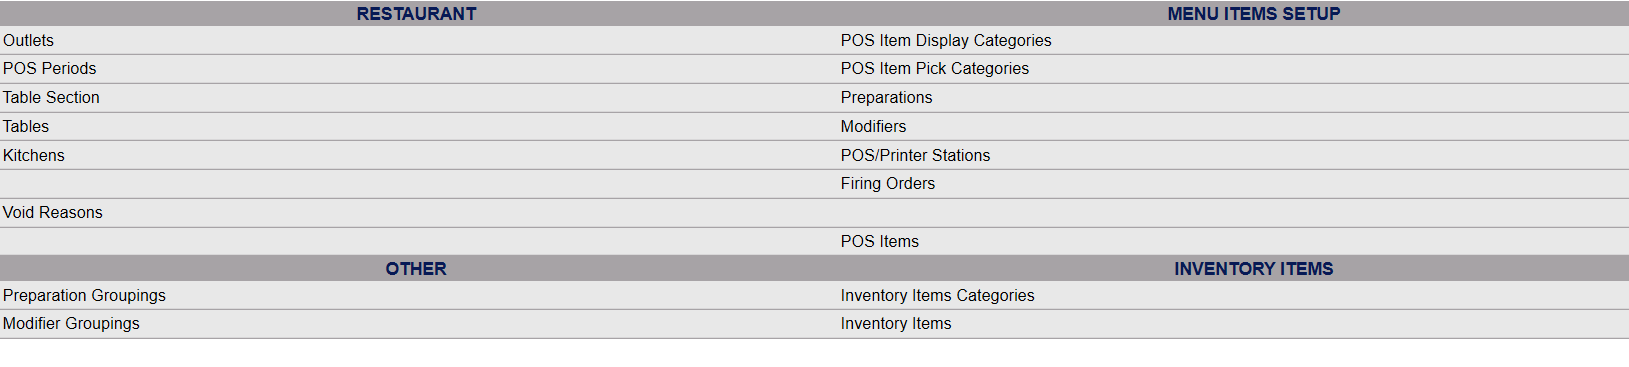
This will take you to the POINT OF SALE (POS) CONFIGURATION menu screen.
This is the Point of Sale (POS) maintenance area, and each entry can be selected for viewing or further configuration. Point of Sale (POS) Configuration area commands are divided into four sections:
Restaurants, Menu Items Setup, Other and Inventory Items.
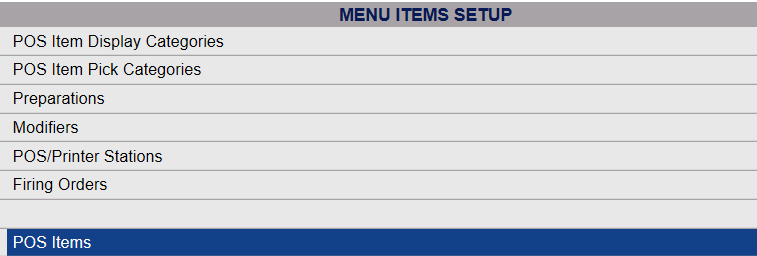
2. From the Point of Sale (POS) Configuration menu, select POS Items from the Menu Items Set Up region.
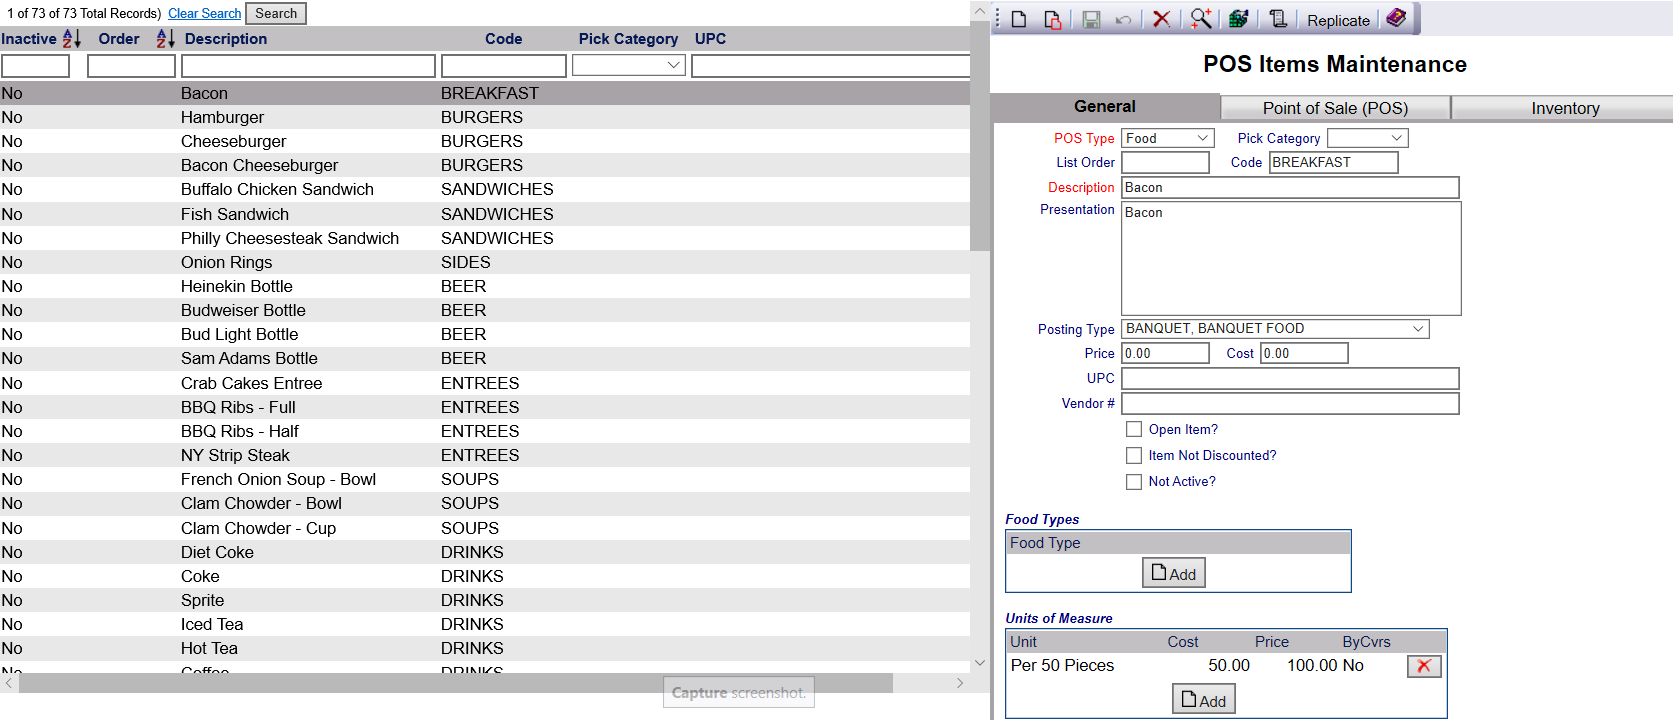
3. When you select POS Items, the Point of Sale (POS) Items Maintenance page will open. It should look similar to this:
4a. If you wish to alter configuration of a Point of Sale (POS) Item that is already present in your system, simply select it from the list on the left and the details of the entry will be displayed on the right.
4b. If you wish to add a new Point of Sale (POS) Item to your system, you will use the buttons in the toolbar above the tabs on the right hand side.

You can either:
- Generate a new entry by clicking the New
 button from the toolbar to add a new Point of Sale (POS) Item.
OR:
- Generate a new entry by selecting an existing Point of Sale (POS) Item from the list on the left, displaying it on the right and clicking the Replicate
 button from the toolbar. Using the small Replicate button will replicate what is on the displayed tab only. The large "Replicate"
  button will replicate the information on ALL the tabs. This is useful if you are configuring multiple similar items that all have similar codes and the same posting type associated with them, such as Soups or Beer selections.
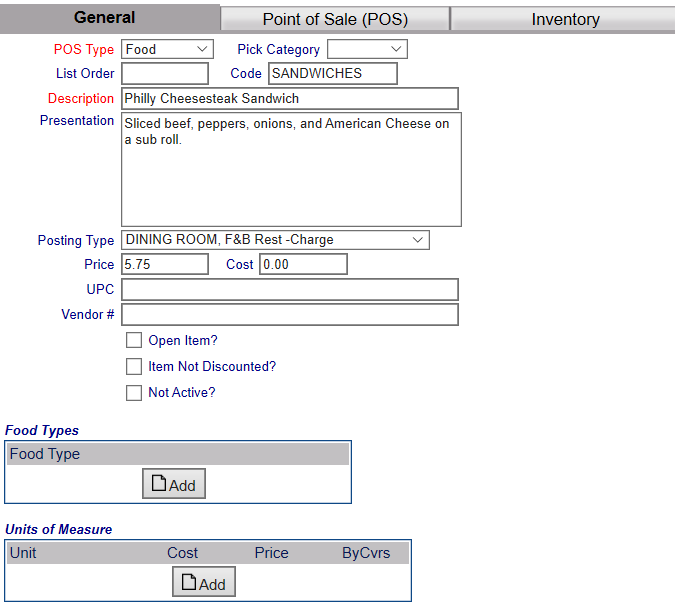
5. Once you are ready, you can configure the Point of Sale (POS) Item entry. Click on the General tab, if not already displayed:
Begin by adding or changing the field information in the General tab, as described below. The information in this section includes the name and code for the item, the price and the posting type. See also POS Items Menu Item Set Up - General tab.
a. POS Type: This is a drop-down menu to select from. Non-food options need to be labeled as "Other" here to ensure they are displayed correctly in any Reports.
This field is required.
b. Pick Category: This is the Pick Category for the Point of Sale (POS) Item, and is a drop-down menu of available options to select from. See POS Items Pick Categories. Your property will have selected categories available during the initial set up of Skyware Systems.
This field is optional.
c. List Order: This determines where each item appears listed in the interface.
Enter a number into the List Order field.
This field is optional. If no order is specified, the Point of Sale (POS) Items will appear in alphabetical order in the interface. Once the Point of Sale tab has been configured, the order may be filtered by the restaurant, meal period, and category selected by the staff (if you configure the options to do so).
d. Code: This is the Firing Order code, if configured. See Firing Orders - Menu Set Up.
Enter a Code for the item. If not using Firing Orders, this can be a descriptive type label or simply a number, depending on how you want to identify the item in your system.
This field is optional.
e. Description: This is the label that appears for the menu item in the interface, and what the Point of Sale (POS) Item is called on the interface.
Enter a Description for the item.
This field is required. Be sure to use a label that staff can easily identify, but that isn't so long as to clutter the interface unnecessarily.
f. Presentation: This helps specify any particular details regarding how the item is to be served.
Enter a Presentation for the item.
This field is optional. If left blank, the Description will be used on any checks.
The Description is the "short" or abbreviated form of the Point of Sale (POS) Item description and is what appears on the screen for the server. If the Presentation is set then that is used on the check for the customer. If not then the Description is used on the receipt.
g. Posting Type: This is where the revenue from this Point of Sale (POS) Item is tracked. Posting types available can be selected from the drop-down menu. If the posting type you need does not appear in the list, you may need to edit the Posting Types configuration for the system.
This field is optional unless the preparation has a price (charge) associated with it. (See Price below).
h. Price: This is how much a Point of Sale (POS) Item will sell for (and what will show up on a check). Enter a Price AND select a Posting Type for the item. While these fields are optional, the Posting Type field is REQUIRED if there is a Price. All charges MUST have a posting type.
i. Cost: This is how much a Point of Sale (POS) Item costs to produce, and is for internal use only.
This field is optional, if no cost is entered the default is 0.00.
j. UPC: This is used for a scanned item, and is typically not used for meals. Point of Sale (POS) Items for Outlets such as gift shops will typically be scanned items.
The field is optional. If used, the UPC requires a symbol (for example #, %) in front of it to display correctly in the system.
k. Vendor #: This is a way to track whom the Vendor is for the Point of Sale (POS) Item, for Inventory purposes.
This field is optional, and may be a name or a number as desired.
l.Open Item?: This option allows you to determine the price of a Point of Sale (POS) Item at the time of sale, for example a "Special" on the menu, or parking at an hourly rate. This box may be checked or unchecked. By default, it is unchecked. If checked, be sure to leave the price box blank. This produces an Open Item on the Restaurant Check screen which can then be completed at the time of ordering with name and price of the Point of Sale (POS) Item.
Any Point of Sale (POS) Item that may have a variable price should be an Open Item.
m. Item Not Discounted?: This option allows you remove Point of Sale (POS) Items from any discounts applied to a check. For example your property may have a policy of never discounting alcohol. If so, any Point of Sale (POS) Item that is alcohol would need this box to be checked to exclude it when the discount is calculated. This box may be checked or unchecked. By default, it is unchecked.
n. Not Active?: This box may be checked or unchecked. By default, it is unchecked.
It should only be checked if the Point of Sale (POS) Item is currently not in use.
If an option is currently not active (for example seasonal options) this box may be checked.
Once a Point of Sale (POS) Item has been added to the list on the left, it will remain in the list (cannot be deleted) if there has been any checks created for it. Once a check is created, it exists in several places in the system, and therefore there cannot be a check for something that does not exist.
6. When you are finished adding or editing the top section of the Point of Sale (POS) Item General tab, click the Save  button to save the changes. You MUST save the changes before continuing.
(To view any changes made, click the Activity log  button in the local tool bar).
You MUST save each new item before continuing with configuration.
7. The next two sections on the bottom of the Point of Sale (POS) Item Maintenance General tab deal with Sales and Catering/Inventory.
These are the Food Type or Unit of Measure to be associated with the item.
These fields have an Add button. This opens the detail screen for the option and allows you to add individual options to menu items using drop down lists.
Food Types:
Food Types are used to categorize your menu items within the Sales and Catering Module of Skyware Systems. These categories are simply used to group the menu items, making the list that staff needs to choose from shorter and therefore easier to navigate quickly.
Click the Add icon under Food Types to assign each meal or food category that applies to the particular item.
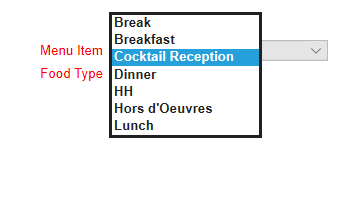
When clicking the Add button, the Menu Item Food Types screen will open. This screen only has two options, one of which you can alter.
Menu Item: This field is the item through which you entered the screen and is therefore grayed out (for example bacon, or cheeseburger).
Food Type: This option lists all the different food types options available for this Point of Sale (POS) Item - for example, entries here could be Breakfast, Hors d'Oeuvres or Deli Buffet. If you want to add or edit an entry in this section select one of the available options from the drop-down menu.
Click the Save icon in the local tool bar, then the Menu Item icon to return to the Menu Items screen.
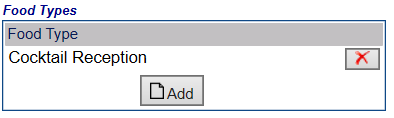
Once selected and saved, the option will appear in the Food Types section box.
Any entry in this box can be deleted by clicking the delete button to remove it.
Units of Measure:
Units of Measure may be added to Menu Items in order to define how the items are
sold. Units
of Measure may be associated with menu items here or on the specific Menus and specify how the particular menu items
can be sold, along with the price per item per Unit of Measure. For example, you might add bacon or cookies to a menu, and define it as "Per 100 pieces". This means the price shown on the menu would be for 100 pieces, not each individual slice of bacon or separate cookie. The drop-down menu lists all available units of measure for this Point of Sale (POS) Item - for example gallons, bottle, # per pieces. For example, beer may be counted by the bottle or by the case.
Click the Add icon under Units of Measure to open the Units of Measure screen.
Menu Item: Again, this field is the item through which you entered the screen and is therefore grayed out (for example bacon, or cheeseburger).
This screen has several options allowing you to specify:
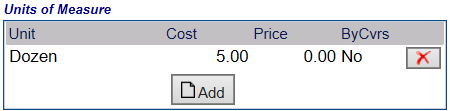
Unit: This drop-down menu is used to indicate how the item is to be sold - per dozen, gallon, bottle, etc . Select one.
This field is required.
Price: Charged to the guest.
Cost: The cost of the item to your Property.
By Covers: This box may be checked or unchecked. You can check the By Covers box to multiply the price of the item by the number of guests ("covers")
attending the event for a total forecasted food revenue.
NOTE::
If By Covers is not checked, the price is a fixed fee.
The food revenue for this item does not fluctuate based on the number
of guests attending the event.
Once selected and saved, the option will appear in the Units of Measure box.
Again, any entry in this box can be deleted by clicking the delete button to remove it.
Note: The Food Types and Units of Measure properties located in the bottom section of the General Tab are used for the Sales and Catering Module system in Skyware, NOT for the POS system. Since the Menu Items list for both systems is the same, you may see some configuration in these fields for existing items. However, they do not pertain to the Point of Sale (POS) system currently.
(For more information on the Sales and Catering system configuration, see Sales and Catering Configuration - Overview).
If your Property does not currently have our Sales and Catering Module and you are interested in adding it, please contact us at Sales@SkywareSystems.com.
8. When you are finished adding or editing the Point of Sale (POS) Item General tab, click the Save button to save the changes. You MUST save the changes before continuing.
(To view any changes made, click the Activity log button in the local tool bar).
Once you have added or edited the information in the General tab for a Point of Sale (POS) Item, you can then move onto configuring the Point of Sale (POS) tab. This contains the commands where you configure the selections that coincide with the physical aspects of the restaurant. See also POS Items Menu Item Set Up - POS tab.
NOTE: None of the fields in the POS tab are required, to the extent that the system will let you move on without adding any options. However, you MUST configure at least one restaurant and at least one meal period for the item in order for the item to appear in the staff interface. This actually allows you to add things like seasonal items into the system but not have them appear in the interface except during times they are available.
9. Click on the POS tab:
Fill in the fields above the line:
a. Color (text): This allows you to pick a custom color for the text in the Point of Sale (POS) Item button that will display in the Restaurant Check screen.
This field is optional; if the field is left blank the default text color is black.
b. Color (background): This allows you to pick a custom color for the background of the Point of Sale (POS) Item button that will display in the Restaurant Check screen.
This field is optional; if the field is left blank the default background color is white.
Note: Usually, the same color is chosen for the text or background of a Point of Sale (POS) Item button as for the category it is under (see POS Item Display Categories) but this is not essential.
c. Firing Order: Point of Sale (POS) Item selections when posted to the check will organize, if a firing order is selected, with items in the same firing category grouped together. See Firing Order for more details. This field is optional, select an option from the drop-down menu if desired. The default option is none.
d. Multi-Post when Qty is greater than one: This means, if checked, if more than one of the same Point of Sale (POS) Item is ordered, they will be listed on separate lines on the check. This can be helpful for splitting a check. This box may be checked or unchecked. By default, it is unchecked.
e. Date of Birth Required?: Year of birth can now be required for a Point of Sale (POS) item (usually alcohol or tobacco of some kind). This box may be checked or unchecked. By default, it is unchecked. If it is checked, then at the time of ordering a Date of Birth must be entered.
f. Preparation Required?: This refers to if a preparation needs to be specified before a Point of Sale (POS) Item may be ordered. For example a pizza order may need to have the size specified. This box may be checked or unchecked. By default, it is unchecked.
g. Modifier Required?: This refers to if a Modifier needs to be specified before a Point of Sale (POS) Item may be ordered. For example, a pizza order may be altered with different types of toppings. By default, it is unchecked.
Note: If a preparation or modifier choice for a Point of Sale (POS) Item results in different pricing, make sure to check the relevant box here so that the server HAS to ask before posting to the check.
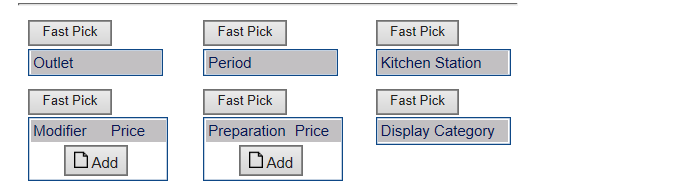
10. Each field below the line on the Point of Sale (POS) tab has to do with where the item will be seen - what Outlet(s), Point of Sale (POS) Period , which Kitchen Stations etc. Again, these options must have already been configured to be available here.
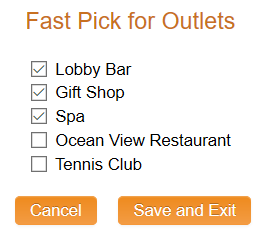
Each field has a Fast Pick button. The Fast Pick button opens a separate screen listing all configured items for that field and provides checkboxes that allow you to easily select (and deselect) multiple options for the field. When finished, click Save and Exit to return to the Point of Sale (POS) tab. The chosen options will now be added to the list of possibles available on the Restaurant Check screen.
for example:
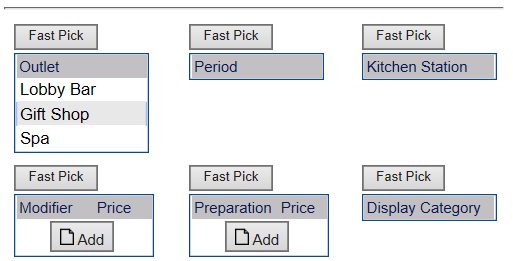
when the orange save and exit button is clicked, the chosen options are now displayed on the Point of Sale (POS) tab:
Some fields also have an Add button. This opens the detail screen for the option and allows you to add individual options to menu items using drop down lists.
The configurable fields in the Point of Sale (POS) tab are as follows:
a. Outlet - Identifies which Outlet(s) serve this item. Click Fast Pick to select the Outlet(s) serving this item.
b. Period - Identifies which Point of Sale (POS) periods this item appears for. If the Point of Sale (POS) Item is always available (for example, coffee), you can assign it to a generic meal period such as "All Day" if you configured one. See Configure Meal Periods for POS (or Configure Time Periods for POS if that is what your Property uses).
c. Kitchen Station - Identifies which kitchen station is responsible for preparing the item for the staff. If the kitchen station is configured with a printer, when the wait staff clicks Kitchen Check in the Restaurant Check screen screen, the items are sent to the kitchen station printer associated with each item on the check.
d. Modifier - Identifies which modifiers to associate with this item. Click Fast Pick and use the checkboxes to select all the modifiers appropriate for this item. For example, if you are configuring a salad, the modifiers might include the different salad dressings you configured as modifiers, or any add-ons such as chicken or salmon.
e. Preparation - Identifies the preparation options configured for the item. Click Fast Pick and use the checkboxes to select all the preparations appropriate for this item. This might include Rare, Medium, and Well for steaks, or Light Toast, Medium Toast, and Dark Toast for bagels or toast.
f. Display Category - Identifies the display category of the item. Categorizing menu items helps staff more easily find items in the interface because they can filter the list by category. However, any item not given a category will still appear in the -ALL- listing of menu items in the POS interface.
Note: Remember, options must be listed in the configuration pages to be available here. See Point of Sale (POS) Configuration Menu Overview for more details.
11. When you are finished adding or editing the Point of Sale (POS) Item POS tab, click the Save button to save the changes. You MUST save the changes before continuing.
(To view any changes made, click the Activity log button in the local tool bar).
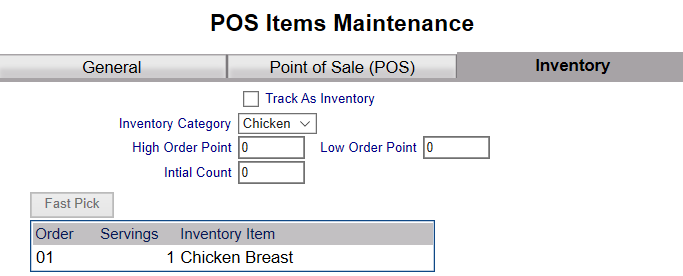
The Inventory tab is where you can track your Inventory of a Point of Sale (POS) item and assign high and low order points; Inventory allows you to track your stocks, generate shopping lists and ensure you never run out of any Point of Sale (POS) Item.
12. Click on the Inventory tab:
Fill in the fields:
a. Track as Inventory: If this box is checked, any time this Point of Sale (POS) Item is sold, it will be tracked and the Inventory items used in its production will be subtracted from the QOH total. See Quantity on Hand.
b. Inventory Category: the Point of Sale (POS) Item is in. This is a drop-down menu to select from available Inventory categories.
This field is optional; if none is selected ALL Inventory Items configured can be selected from in the Fast Pick box.
c. High Order Point: This is the maximum inventory number of the Point of Sale (POS) Item you want on hand at any given time.
d. Low Order Point: This is the inventory number at which you wish to trigger the re-purchase of a Point of Sale (POS) Item.
e. Initial Count: Inventory Initial Count. this is only used for the first Shopping List. See Shopping List.
Note: Be sure to set these numbers at points that will ensure you do not run out of a Point of Sale (POS) Item, but do not have an excess of stock on hand that can spoil or pass expiration dates.
f. Click the Fast Pick button to add Inventory Items used in the Point of Sale (POS) Item:
This lists the Inventory Items that can be configured as being used in the production of Point of Sale (POS) Item, and you can manually enter how many of each Inventory item are used. See Inventory Category - POS and Inventory Items - POS for details on configuring Inventory Items.
Once your selections have been made, click the orange "Save and Exit" button to return to the Inventory tab screen, where your selections will now be displayed.
13. When you are finished adding or editing the Point of Sale (POS) Item Inventory tab, click the Save button to save the changes. You MUST save the changes before continuing.
(To view any changes made, click the Activity log button in the local tool bar).
14. Your Point of Sale (POS) Item should now be configured correctly and available anywhere and any time you specified. Congratulations!
Date Updated October 29, 2025